| Top rated - Official Art |

bowarrow.jpg1552 viewsBow and Arrows.
(3 votes)
|
|

compass.gif1664 viewsCompass.
(3 votes)
|
|

Rock.jpg1346 viewsA rock from Death Mountain.
(2 votes)
|
|

keese.jpg1456 viewsKeese.
(1 votes)
|
|

gel.gif1457 viewsGel.
(1 votes)
|
|

yellowruby.gif1448 viewsYellow Ruby.
(3 votes)
|
|

stalfos2.gif1553 viewsStalfos.
(2 votes)
|
|

z3-link-battles-gannon.jpgLink Battles Ganon6840 viewsSources: Image from the Official Link to the Past Nintendo Player's Guide. Scanned and Edited by Melora. The Illustrator was possibly Katsuya Terada. Notes: I had to think about where I wanted to place this image. Since it was from the LttP guide, but was illustrating back story for the original Legend of Zelda, I decided on this section. -Thought it would be fun to call him Gannon, like the original game text- silly me. Anyway, I love this picture of Link fighting Ganon, the silver arrow drawn for the final blow.Melora
(13 votes)
|
|

Zelda.jpg1970 viewsPrincess Zelda.
(5 votes)
|
|

fairy.jpg2036 viewsLink meeting a fairy in a pond.
(5 votes)
|
|

likelike.jpg1426 viewsLike Like.
(2 votes)
|
|

gibdo2.gif1358 viewsGibdo.
(2 votes)
|
|

Trap.jpg1452 viewsTrap.
(2 votes)
|
|

GleeokHead.jpg1256 viewsGleeok's head.
(2 votes)
|
|

patra.gif1397 viewsPatra.
(1 votes)
|
|

sword.gif1370 viewsSword.
(1 votes)
|
|

PolVoice.jpg1343 viewsPol's voice.
(1 votes)
|
|

Wallmaster.jpg1380 viewsWallmaster.
(4 votes)
|
|

linkcrouched.jpg2703 viewsLink crouched, with sword and shield ready (from included map).
(6 votes)
|
|

manhandla.jpg1861 viewsManhandla.
(6 votes)
|
|

z3-link-and-zelda.jpgLink and Zelda6061 viewsSources: Image from the Official Link to the Past Nintendo Player's Guide. Scanned and Edited by Melora. The Illustrator was possibly Katsuya Terada. Notes: I had to think about where I wanted to place this image. Since it was from the LttP guide, but was illustrating back story for the original Legend of Zelda, I decided on this section. I love this end-game imageMelora
(12 votes)
|
|
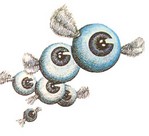
patra.jpg1436 viewsPatra.
(3 votes)
|
|

bubble2.jpg1353 viewsBubble.
(3 votes)
|
|
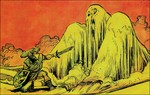
z3-link-and-monster.jpgDesert Hazards3314 viewsSources: Image from the Official Link to the Past Nintendo Player's Guide. Scanned and Edited by Melora. The Illustrator was possibly Katsuya Terada. Notes: I had to think about where I wanted to place this image. Since it was from the LttP guide, but was illustrating back story for the original Legend of Zelda, I decided on this section.Melora
(2 votes)
|
|
| 241 files on 11 page(s) |
 |
1 | |
|
|
|
|
|
|
|
|
|
|
 Register