| Most viewed - Scenes (LoZ) |

z3-link-battles-gannon.jpgLink Battles Ganon6711 viewsSources: Image from the Official Link to the Past Nintendo Player's Guide. Scanned and Edited by Melora. The Illustrator was possibly Katsuya Terada. Notes: I had to think about where I wanted to place this image. Since it was from the LttP guide, but was illustrating back story for the original Legend of Zelda, I decided on this section. -Thought it would be fun to call him Gannon, like the original game text- silly me. Anyway, I love this picture of Link fighting Ganon, the silver arrow drawn for the final blow.Melora
|
|

z3-link-and-zelda.jpgLink and Zelda5804 viewsSources: Image from the Official Link to the Past Nintendo Player's Guide. Scanned and Edited by Melora. The Illustrator was possibly Katsuya Terada. Notes: I had to think about where I wanted to place this image. Since it was from the LttP guide, but was illustrating back story for the original Legend of Zelda, I decided on this section. I love this end-game imageMelora
|
|

z4-silver-arrow.jpgSilver Arrow5647 viewsSources: Image from the Official Link's Awakening Nintendo Player's Guide. Scanned and Edited by Melora. Notes: I had to think about where I wanted to place this image. Since it was from the LA guide, but was illustrating back story for the original Legend of Zelda, I decided on this section.Melora
|
|

z3-link-and-impa.jpgLink and Impa4151 viewsSources: Image from the Official Link to the Past Nintendo Player's Guide. Scanned and Edited by Melora. The Illustrator was possibly Katsuya Terada. Notes: I had to think about where I wanted to place this image. Since it was from the LttP guide, but was illustrating back story for the original Legend of Zelda, I decided on this section.Melora
|
|

z3-link-in-dungeon.jpgDungeon Ruins4111 viewsSources: Image from the Official Link to the Past Nintendo Player's Guide. Scanned and Edited by Melora. The Illustrator was possibly Katsuya Terada. Notes: I had to think about where I wanted to place this image. Since it was from the LttP guide, but was illustrating back story for the original Legend of Zelda, I decided on this section. Great picture of Link in a labyrinth.Melora
|
|

z3-link-ever-vigilant.jpgEver Vigilant3911 viewsSources: Image from the Official Link to the Past Nintendo Player's Guide. Scanned and Edited by Melora. The Illustrator was possibly Katsuya Terada. Notes: I had to think about where I wanted to place this image. Since it was from the LttP guide, but was illustrating back story for the original Legend of Zelda, I decided on this section. After defeating evil, Link remains ever vigilant.Melora
|
|

z4-impa.jpgImpa3813 viewsSources: Image from the Official Link's Awakening Nintendo Player's Guide. Scanned and Edited by Melora. Notes: I had to think about where I wanted to place this image. Since it was from the LA guide, but was illustrating back story for the original Legend of Zelda, I decided on this section.Melora
|
|
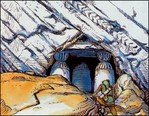
z3-link-dungeon-entrance.jpgLink at the Dungeons Entrance3693 viewsSources: Image from the Official Link to the Past Nintendo Player's Guide. Scanned and Edited by Melora. The Illustrator was possibly Katsuya Terada. Notes: I had to think about where I wanted to place this image. Since it was from the LttP guide, but was illustrating back story for the original Legend of Zelda, I decided on this section. -Link going to one of the mountain top dungeonsMelora
|
|
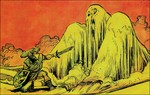
z3-link-and-monster.jpgDesert Hazards3184 viewsSources: Image from the Official Link to the Past Nintendo Player's Guide. Scanned and Edited by Melora. The Illustrator was possibly Katsuya Terada. Notes: I had to think about where I wanted to place this image. Since it was from the LttP guide, but was illustrating back story for the original Legend of Zelda, I decided on this section.Melora
|
|

ganondefeated2.jpg2693 viewsBetter version of above image.
|
|

merchant2.jpg2656 viewsBetter version of above image.
|
|

fairy2.jpg2565 viewsBetter version of above image.
|
|

trapped2.jpg2466 viewsBetter version of above image.
|
|

deathmountain3.jpg2408 viewsBetter version of above image.
|
|

dungeon3.jpg2394 viewsBetter version of above image.
|
|

linksearching2.jpg2376 viewsBetter version of above image.
|
|

impa2.jpg2295 viewsBetter version of above image.
|
|

impa.gif2235 viewsLink helping Impa.
|
|

lanmola2.jpg2202 viewsBetter version of above image.
|
|

boomerang2.jpg2052 viewsBetter version of above image.
|
|

ganonleg2.jpg2033 viewsBetter version of above image.
|
|

ganondefeated.jpg1993 viewsLink defeating Ganon and getting the Triforce of Power.
|
|

fairy.jpg1927 viewsLink meeting a fairy in a pond.
|
|

deathmountain1.gif1907 viewsLink looking at Death Mountain from atop a cliff (version 1).
|
|
| 33 files on 2 page(s) |
 |
1 | |
|
 Register